
You may know that the Fitbit app has some built in menstrual cycle tracking features, but many people do not know that it has other features that may be useful for menstrual cycle tracking. In this article, I will review the pros and cons of the Fitbit app as it relates to cycle tracking for people who ovulate. For context, I use a Fitbit Charge III.
The most basic feature that Fitbit offers for cycle tracking is recording bleeding dates of menstruation and then displaying a predicted fertile window based on average cycle length.
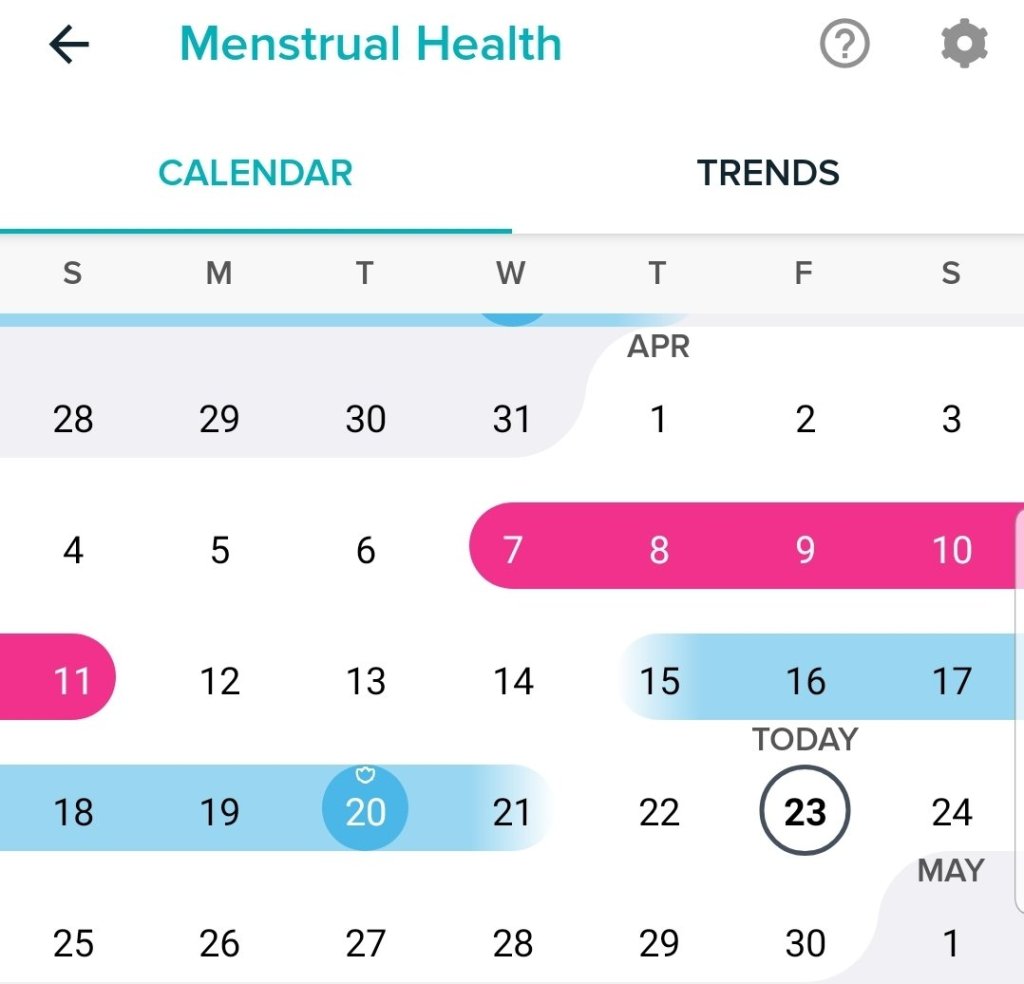
The user needs to remember to input menstuation each cycle. Once it is inputted, Fitbit will generate the blue fertile window. This fertile window should NOT be used for avoiding pregnancy, as it is only based on cycle length and not real-time fertility signs like cervical mucus or basal body temperature.
Once menstruation is entered, it will also begin a countdown until your next predicted menstrual cycle.

Unfortunately, I do not find this basic feature very useful for anyone who has any cycle variation. Even though my cycle length has increased over the last year, Fitbit has not automatically updated my cycle lengths. The app does not appear to be very adaptive without user input.
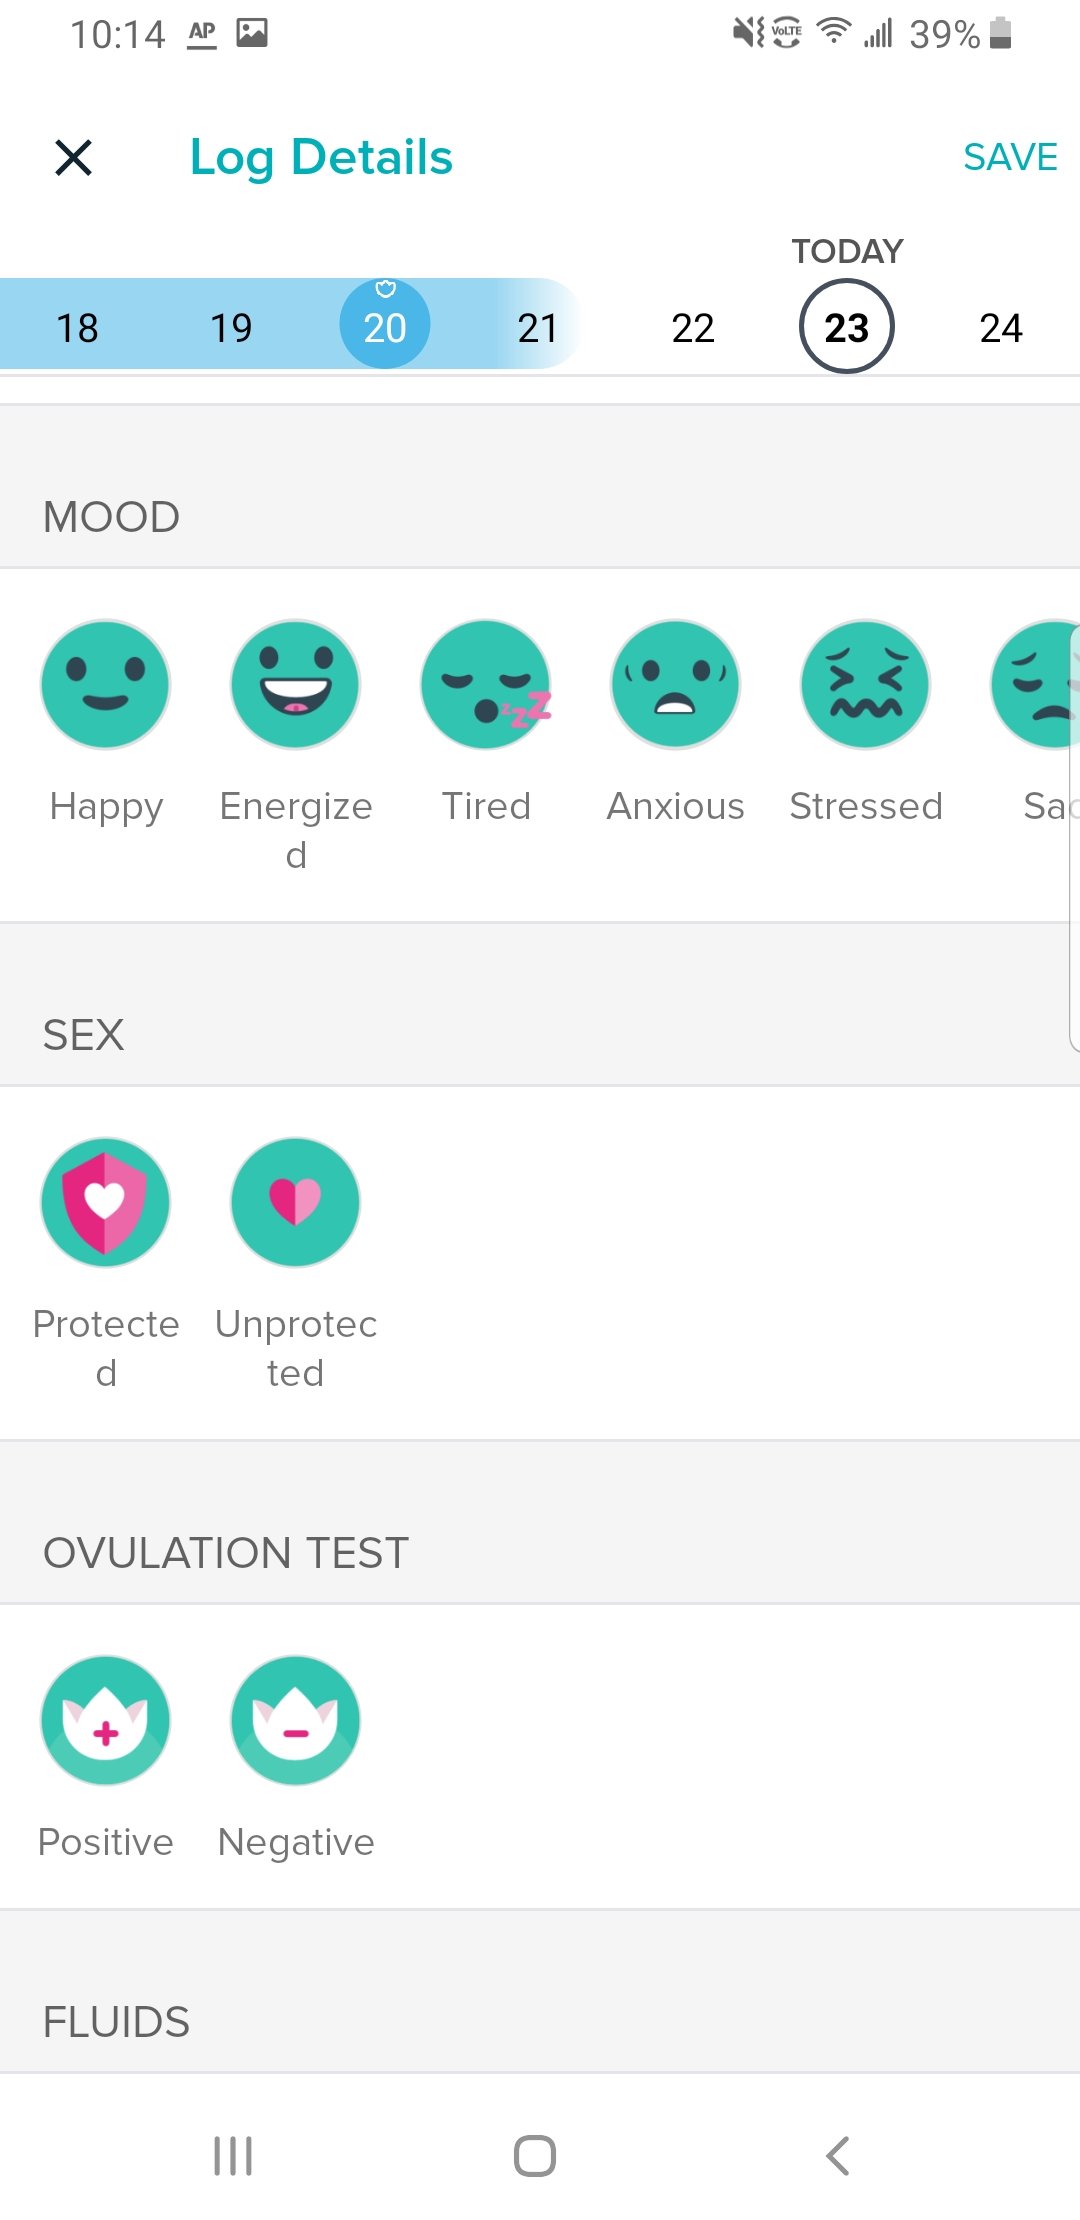
In addition to tracking bleeding the app offers options for:
- Mood
- Plan B (morning after)
- Ovulation tests (better called luteinizing hormone tests)
- Cervical mucus (Taking Charge of Your Fertility categories)
- Cyclical symptoms like acne
It is rather disappointing that the app does not include options to mark pregnancy when it occurs, especially since we know that this changes daily calories burned and heart rate, to name just two effected areas of the app.


A really cool feature that I do like is the ability to show cycle trends like flow intensity and cramps. The same screen that displays this will also let you scroll through all past cycle lengths.

In the settings of this screen, you can also decide to toggle off predictions. For people avoiding pregnancy, I do recommend either ignoring or toggling off predictions in the Fitbit app. The app allows you to choose your current birth control method as well.

Outside of the designed menstrual cycle tracking features, I want to highlight resting heart rate as a potential exciting thing to track for those who are not taking hormonal contraception. Why do you need to not be taking hormonal contraception to utilize the heart rate feature for menstrual cycle tracking? Hormonal contraception suppresses ovulation, and ovulation changes our heart rate charts!
To learn more about resting heart rate and the menstrual cycle, read my previous post here.

Heart rate in people who are ovulating is at its lowest point during menstruation, rises during the fertile window, and continues to be elevated in the luteal phase.
When heart rate begins to drop again, this is an excellent way to predict menstruation will soon occur. For example, I have been tracking my heart rate in Fitbit for 2 years, and I always bleed when my heart rate dips back down to 70 beats per minute after my luteal phase!
I do think this feature is worth tracking for anyone interested in a more precise period prediction than cycle length. If you have Fitbit premium, you can also find a setting for sleeping heart rate under restoration. This may be more steady than resting heart rate for some individuals.

Lastly, I want to address Fitbit temperature for menstrual cycle tracking. Unfortunately, wrist temperatures are not a compatible parameter for fertility awareness when it comes to avoiding or achieving pregnancy. It can be incredibly erratic. When we track temperature, we want the temperature as closest to the core as possible.

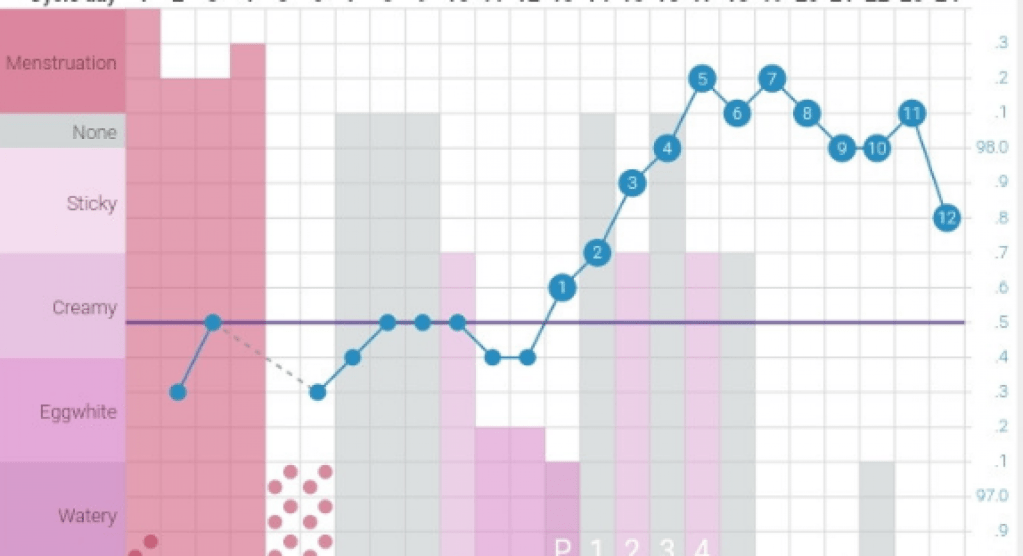
Fitbit does not give precise temperatures, instead it gives deviations from a range. I likely ovulated near 18, 19, or 20 on the photo above. While Fitbit did detect a slight shift, it is not particularly clear, and it dropped back down.

As depicted above, my luteal phase the previous month was extremely undefined, and I could not determine a confirmed temperature shift with it.
For now, I do not recommend Fitbit for precise temperature tracking. Instead, I recommend a basal body thermometer.
Conclusion
Fitbit offers some really unique options for cycle tracking, but it should not replace your birth control or fertility awareness method. The heart rate feature may be useful for identifying cycle phases, but the temperature readings are not suitable for tracking cycle phases.

You must be logged in to post a comment.